Before expanding on the idea of metrology being applied on any CNC machining process, let’s explain some basic concepts in the open. For starters, metrology is the science that allows us to understand measurements. Nearly every principle of metrology is applied in CNC machining throughout production to make sure that each part is machined following the required specifications of the project.
You are probably thinking about using essential tools such as rulers or measuring tapes to mark inches or millimeters. Is not that easy, mainly because the measuring dimensions for CNC machined parts require some very specific levels of tolerance. These tolerances are often measured using centesimal parts of an inch, and as such, you can obtain those measurements using conventional tools. You need computer software and experienced technicians to handle this stage of development.
All CNC machining companies use different types of metrology tools. Most of the time, the determining factor on the tool that will be used is the full specs of the project being developed. The following is a list of the most popular metrology tools used across the industry:
Air Gages
Air gages are devices that use pressured air to measure the size of an object. They were created in 1940, and they are still around, albeit with a lot of upgrades to keep the device with the times. Air gages are regarded as some of the most precise measuring tools used in machine shops. This tool functions by shooting air out of a calibrated nozzle to record the rate of return of said air through multiple vents that are sensitive to it. It’s essentially a device used to read the airflow between the tool itself and the measured object.
Calipers
A Calipers is a measuring tool base on balance. There are a ton of them in the market, but the basic principle behind all of them remains the same. The tool is supposed to allow two opposing tips to stay still at the beginning and on the end of any given distance being measured. These are the most well-known calipers available out there:
- Vernier calipers: the first model of caliper debuted back in the 1600s. These are created using a flat bar with two opposing tips slide. The distance placed between the tips is measured using a graded scale that comes in inches or millimeters.
- Dial calipers: this tool works just like Vernier calipers, but the measurements are displayed on a simple dial that makes them easier to read.
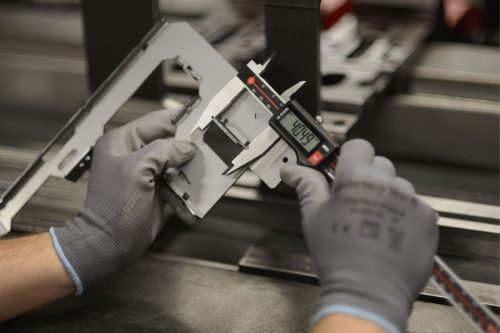
- Digital calipers: work by the same basic principle, but relies on the accuracy of digital technology to display the measurements.
Caliper micrometer: a tool specially created to measure minimal measurements manually. It replaces the flat bar with a screw.

digital calipers*
Coordinate Measuring Machine
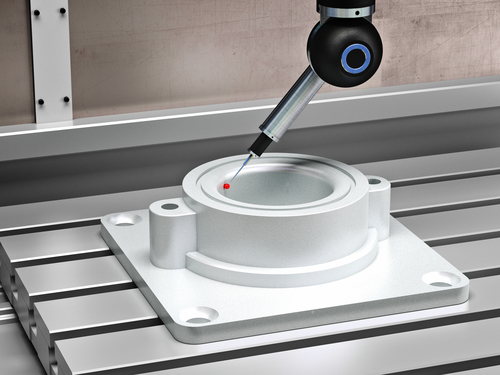
This device is also known as CMM, and it was created back in the 1950s. It’s a mechanical device in nature that was designed to automate measurements. They are presented bearing upside-down “U” shapes with moving legs that can go on any side of a surface plate. The probe can also move side-to-side inside the U-bridge as well as up and down, so it’s pretty much able to cover the X, Y, and Z-axis.
Modern CMMs run on optical technology. They handle the task very differently to the way they initially used to work when they have to probe components. The part that measures objects needs to be at close proximity to do its job. Not so long ago, all probes were strictly mechanical, and they had to record every coordinate making direct contact with a surface of the piece. The lenses of modern CMMs can scan and register the measurements as well as make a contrast with base plans to get results.

coordinate measuring machine**
Go/No-Go Gages
This wonderful tool is used to measure the proper tolerances of machined pieces. The “no-go” rates the negative end of the tolerance range, while the “go” part rates the positive aspects of it. It’s a simple way to tell if a machined piece will work the way it’s supposed to go.
Laser Scanning Arms
Laser arms are regarded as a high-end metrology tool. Most of these devices are portable, something that allows technicians to measure as many dimensions as they need. The tool is well regarded for being precise to handle millions of calculations per second. Laser arms are also pretty functional since they automatically take measurements from every single angle of an object. They are also one of the best tools to handle any form of reverse engineering or to detect flaws of unknown origin.
Surface Plates
A surface plate is a flat surface used to create reference POVs used on vertical measurements. They are useful when they are calibrated as they should, and the measuring surface is kept impeccably. Most surface plates are made using granite because the material is known for having a naturally smooth surface and low levels of expansion/ contraction with temperature changes.
Reference
*Image from on https://www.bestconsumerreviews.com
**Image from on https://willrich.com
